How To Delete An Empty Page In Word For Mac
If you work in IT, learn how BetterCloud’s Unified SaaS Management platform can help you manage G Suite and other applications. Get the all-in-one guide to supercharge your productivity with OneNote.
Microsoft Word users may run into this problem from time to time: a blank page either in the middle or at the end of a document that cannot seem to be deleted. Frustrating! You can choose to print only select pages, but that doesn’t exactly solve the problem.
Jan 11, 2020 The process for using the Delete key to remove a page is similar to using the Backspace key. However, to remove text by pressing the Delete key, place the cursor at the beginning of the text you want to remove instead of at the end.
Here are some possible steps to delete your unwanted blank page. The video above will also walk through these steps.
Basic solutions
- The most basic solution: go to your unwanted blank page, click as close to the bottom of the page as you can get, and press your backspace key until the page is removed.
- Go to the VIEW tab, select Navigation Pane in the Show section, select the blank page thumbnail in the left panel, and press your delete key until it is removed.
- Check your sections: Go to the PAGE LAYOUT tab, click the Margins button, and select Custom Margins. Click the Layout tab. In the drop-down menu next to Section start, make sure that New page is selected. Click OK.
Use paragraph symbols
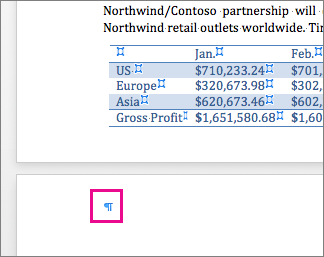
- Detect what’s on the page by displaying paragraph marks and formatting symbols. Look on your blank page to see if there are any symbols, especially the paragraph mark,
or ¶. Select the symbol and delete it, and you will likely also delete your blank page. - If your blank page is in the middle of the document, it may be due to a manual page break. With paragraph marks turned on, you will be able to see the page break. Select it and delete it.
Trouble with tables
- If there is a table at the end of your document, Word will automatically insert a paragraph after it, often resulting in a blank page at the end. While you can’t delete this inserted paragraph, you can make it extra small so it doesn’t cause a new page to be displayed. With paragraph marks turned on, select the paragraph symbol and change the font size to 1 point.
- If you still see a paragraph mark on the blank page, change the spacing around it. Select the paragraph symbol, go to the Paragraph section and launch the Paragraph formatting dialog box by clicking the pop-out icon in the lower right corner of the section. On the Indents and Spacing tab, change any spacing before or after the paragraph to 0. Change the Line spacing to 0. Click OK.
- If those two options didn’t work, you can hide the paragraph. Select the paragraph symbol, and launch the Font dialog box by clicking the pop-out icon in the lower-right corner of the Font section on the HOME tab. Select the Hidden check box in the Effects section and click OK.
Click here to watch this video on YouTube.
Ever been completely stumped by a task that should be incredibly easy?
Me too. It’s the worst feeling. After you’ve done all the hard work, you simply cannot figure out how to do that one simple thing. In this case, it’s deleting that extra unwanted page you have in Microsoft Word that just doesn’t want to go away.
How to delete a page in Word
- Press Ctrl+G (or Option+⌘+G on a Mac)
- A window pops up and in the 'Enter page number:'field type page
- Hit enterthen 'close'
- Hit backspace to delete the entire page.
Thankfully, once you know how to do it, it’s easy! If you're editing Word docs a lot, you might also want to consider tracking changes before you start deleting your pages.
There are several different ways you can delete the unwanted page in your Microsoft Word document. I’ll go through each option step-by-step, so next time you’ll be ready to banish that annoying extra page!
| Tip: Learn how to find and replace in Word! |
1. Press the backspace key
This one is easy. Move the cursor to the bottom of the page you want to delete, then press the backspace key over and over until the page finally deletes. Sometimes it only requires one or two backspace presses, other times it’s much more. If you’re feeling particularly frustrated with Word, this might be a good way to let loose some steam.
2. Select the page content and delete
In Word, press ⌘+Option+G (or Ctrl+G) to open up the ‘Find and Replace’ window. It will automatically be opened on the ‘Go to’ tab. In the field box that says ‘Enter page number:’ type page.
Press ‘enter’ and then click ‘Close.’ Now any content that exists on that page is selected. Hit the backspace key and ta-da! That pesky page is gone.
3. View the page and delete
Go to the ‘View’ tab and check the box next to ‘Navigation Pane.’
A sidebar will appear on the left with each page of your document. Click on the page you wish to remove. Hit backspace until the page is deleted.
4. Make any extra paragraphs smaller
Extra paragraphs at the end of your document may be the reason you have an extra page. You can look by clicking the ‘Show/Hide P' (P being the paragraph symbol) button on the ‘Home’ tab.
If there are paragraph marks leaking onto another page, you might be able to simply delete them. If they cannot be deleted, you can make them smaller and force them onto the page above. To do so, change the font size to 01.
Now that they are smaller, they should move onto the top page, which means the page they were on will be deleted!
Tip: If the paragraphs remain on the blank page, don’t despair. This happens often when there are tables or graphs at the end of a page. There’s another trick you can try.
Right-click on the empty paragraph and select ‘Paragraph.’ Navigate to the ‘Line and Page Breaks’ tab. Clear out the ‘Page break before’ box so that it is empty.
That should solve any issues with stubborn paragraphs!
5. Delete a page break
While you have the paragraph marks showing, check to see if there are any manual page breaks above or on the page in question. If there is a page break — you’ll be able to tell as it will say ‘page break’ — delete it.
When it is gone, the extra page will be gone with it.
To hide the paragraph marks, hit the ‘Show/Hide P’ button again.
6. Double check your sections are set up correctly
Still having trouble? Your sections might be set up incorrectly. To check, go to the ‘Layout’ tab and select Margins. A drop-down menu will appear. From there, click on ‘Custom Margins…’
A pop-up window will appear. Look to the drop-down menu next to ‘Section start:’ located at the top of the window. Make sure ‘New page’ is selected.
Then click ‘OK.’
| Related: Learn how to change margins in Google Docs! |
You have deleted the page in Word!
One of these methods should have worked for you, and now you can move on without that extra page hindering you and your Microsoft Word document.

Keep track of how long your project is and learn how to check your word count in Word or learn how to double space in Word. And to boost your efficiency, take a look at some Microsoft Word keyboard shortcuts.
How do you rate Microsoft Word?
Review Microsoft Word and join hundreds of thousands of software users sharing their insights on G2. You'll make your voice heard and help your peers in the process.